- Posted May 21, 2013, 1:06 p.m. - 12 years ago
Editing Text Across Columns or Pages In a PDF
Text in Infix is placed into text boxes. You can position text boxes anywhere on the page by clicking the Text tool and clicking in an empty space.
If you click inside an existing text box while the Text tool is highlighted, the text inside that text box becomes editable.
What if Text Overflows?
For long sections of text, a single text box won’t be big enough. Aesthetically, one very large chunk of text is not always easy to read. If you want to vary the layout of your text, you’ll need to split it over several columns or pages.
If you’re interested in building a complex layout, you may also want to arrange multiple textboxes on a page and have the text flow through them in a particular order.
Manually maintaining the text in each box is incredibly difficult, particularly if your document changes often. But you don’t have to continually shift and edit the text in order to get it to fit. You can use Infix’s Linked Text feature instead.
Linked Text is available in both the Standard and Pro versions of Infix.
Linked Text Prerequisites
Before you start to work through the steps in this article, you’ll need to check a setting in Infix to ensure your choices are retained when the document is closed and re-opened.
- Click File, then Preferences. Select the Saving tab.
- In the Store layout info in PDF drop-down list, select Always.
- Click OK.
Setting Up Text Flow in a PDF
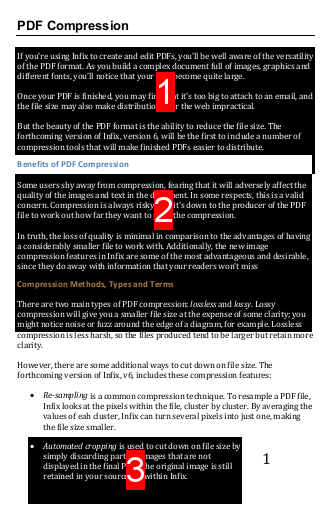
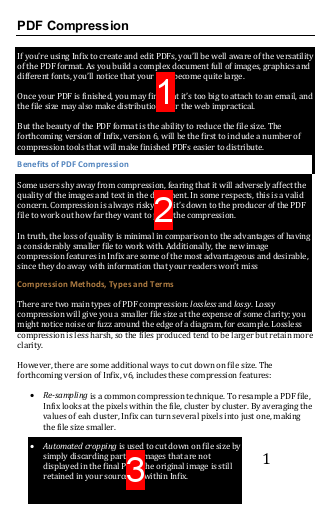
As the name suggests, Linked Text is a function that allows you to join several separate text boxes together in a particular order. When text boxes are chained in this way, they behave like one text box, and the text you place will automatically flow between the text boxes if it overspills the first one.
First, ensure the Linked Text tool is selected, then click each one of the text boxes you want to link together. Start with the first; click it in the centre, then click the second, third and so on. You’ll notice that a white number on a red background indicates the order of flow.
If you make a mistake and click the wrong box, click the box again to remove it from the chain, then click the correct one instead.
When you’re done, switch to the Text tool and decide how you want the copy to flow. You may need to cut the contents of the boxes and paste them together again so that the flow works properly.
Once edited and repositioned, your copy will flow seamlessly from the first box in the chain to the last, following the pre-defined order you set up in the first step.
To go back and change your link order, switch back to Linked Text and click one of the boxes you selected originally. The boxes will become highlighted again, and you can make the required changes.
Latest Articles
-
Our latest testimonial for Infix 6
Dec. 19, 2016, 2:40 p.m. -
Most commonly translated Turkish words
Feb. 6, 2015, 9 a.m. -
Merry Christmas & A Happy New Year
Dec. 25, 2016, 8 a.m. -
New Save PDF to SVG feature introduced to Spire.Office
Dec. 23, 2016, 11:54 a.m. -
Editing educational PDFs – a user perspective
July 21, 2014, 8:03 a.m.


