- Posted Sept. 21, 2012, 11:24 p.m. - 12 years, 9 months ago
Create a PDF with an Index
We wrote about a use for PDFs by musicians. Replacing their music books and sheet music with PDFs would save a lot of weight and prevent music from being blown off the stand at outdoor concerts.
 In this post we will walk you through all the steps to successfully create your music book with an active index. You will be able to click on a song title and immediately arrive at the page without having to scroll through (or flip through on tablets) the book to find your song.
This is not limited to music but can be used on any document you wish to create. We will use Adobe Acrobat for this instruction.
Open up a command window and go to the folder where your separate PDF files are located. Type dir > _index.txt or you can name any filename you wish. We put an underscore as the first character so it would be easy to find.
Open the _index.txt file in a text editor and clean up the file listing and print the file as a PDF. Now open a browser window where you have your files stored, then select all of the files you wish to include in the single PDF book. Make sure you include the _index.pdf file and not the index.txt file.
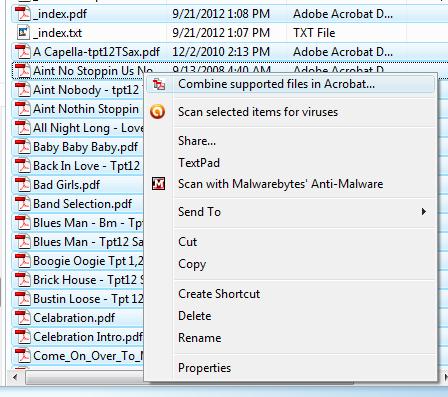
Right-click on the selected files and click on Combine supported files in Acrobat…
Adobe Acrobat will open up and you will get a window that will show the selected files.
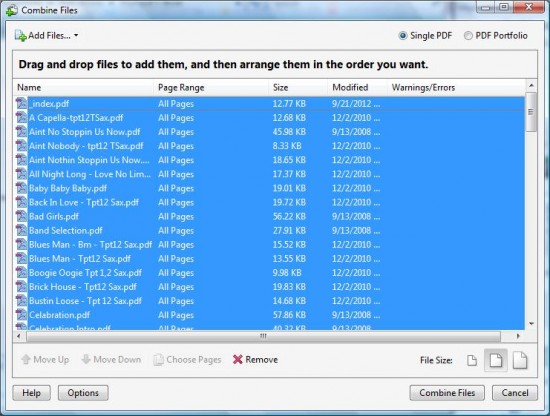
You can re-arrange the files or drag and drop additional files if you wish. Make sure the _index.pdf file is at the top of the list. You could also add a cover page. If you do that, make sure it is above the index file. Now click the Combine Files button.
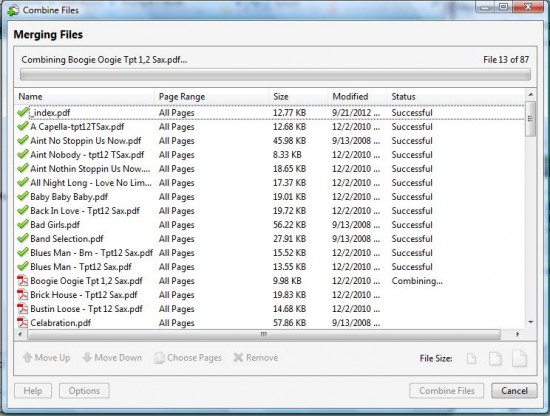
You will now see green check boxes as the files are merged into a single file.
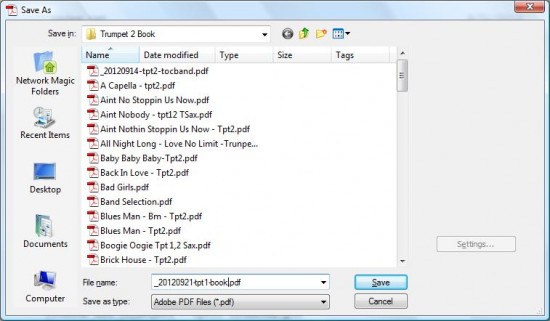
After the merge is complete, save the file. Now you will be ready to create the active index, so open the merged file in Acrobat.
Select the Link tool by going to Tools | Advanced Editing and select the Link Tool.
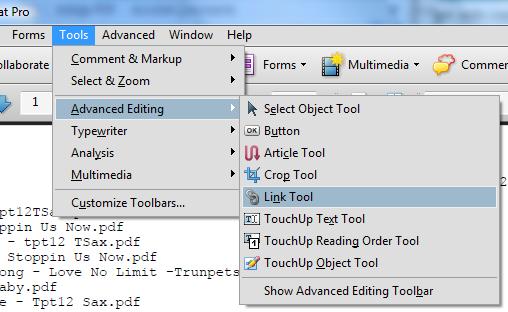
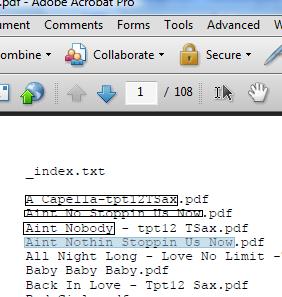
Once the Link tool is selected, you are ready to create your links. With the “+” cursor, draw a box around the first index item. The area will be blue and release the mouse button when the correct area is covered. This will be the area you will click to jump to the selected page.
A create link window will now open.
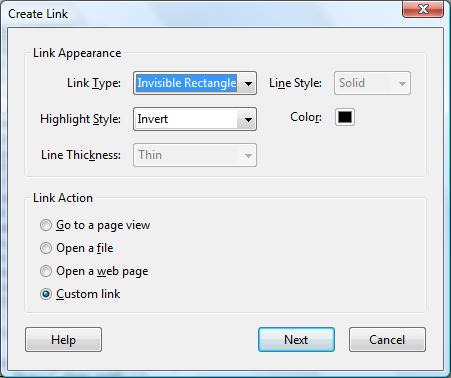
Click the Next button.
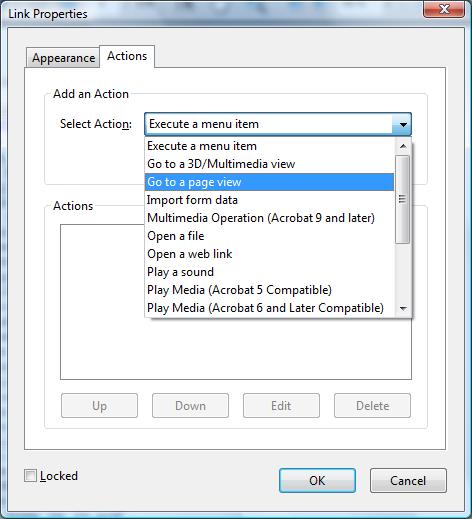
In the link properties window, go to the Actions page and select Go to a page view from the drop-down menu.
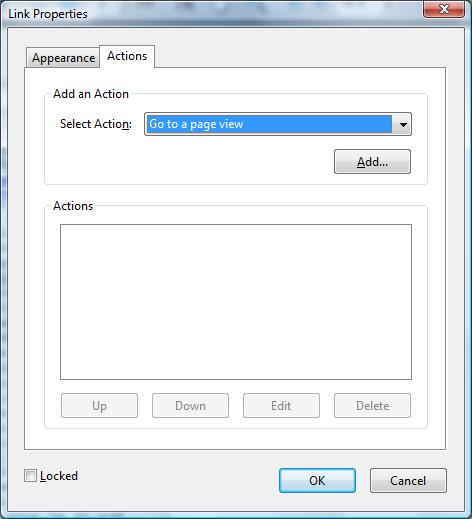
Now click the Add button. You will see a Create Go to View window. Follow the directions in the window.
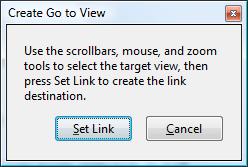
Scroll to the page in the PDF document you wish to link to. Make sure the top of the page is fully at the top of the Acrobat screen.
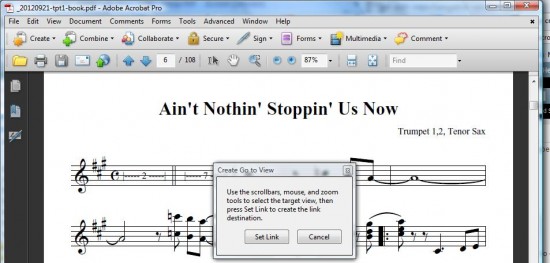
Now click the Set Link button and click OK Button on the Link Properties window.
Your link tool will still remain active, so keep drawing boxes around the index items and keep creating the links to the pages. Once you are finished, save the PDF and you are finished. For very large documents it may take you several editing sessions to finish the document. Just be sure to periodically save the file.
Latest Articles
-
Our latest testimonial for Infix 6
Dec. 19, 2016, 2:40 p.m. -
Most commonly translated Turkish words
Feb. 6, 2015, 9 a.m. -
Merry Christmas & A Happy New Year
Dec. 25, 2016, 8 a.m. -
New Save PDF to SVG feature introduced to Spire.Office
Dec. 23, 2016, 11:54 a.m. -
Editing educational PDFs – a user perspective
July 21, 2014, 8:03 a.m.


